Tutorial: from zero to your first production plan
This is the main route for anyone who just joined Plantaro. Following the steps below, in about 30 minutes you will have a crop, an area with beds and a working production plan, and you will know where to follow everything.
Prefer to be guided inside the system? Plantaro has an interactive tutorial that opens on its own on first access and walks you through each screen. See Interactive tutorial and common questions.
What you will create
We will use a simple example you can adapt to your reality:
| Item | Example in this tutorial |
|---|---|
| Property | Sítio Tutorial |
| Crop | Alface Crespa (curly lettuce) |
| Area | Horta Principal (10 m × 20 m) |
| Beds | 6 beds of 1 m × 10 m |
| Plan | Alface Primavera, starting on 01/10 |
The complete path
Each step uses data created in the previous one. Do not skip the order: without a crop and beds there is no way to build the plan.
| Step | What to do | Required? | Where in the menu |
|---|---|---|---|
| 0 | Sign in and have an active subscription | Yes | Subscriptions |
| 1 | Learn the navigation | Yes | — |
| 2 | Register categories, suppliers and supplies | No | Inventory & Supplies |
| 3 | Register the crop and its stages | Yes | Crops |
| 4 | Create the planting area | Yes | Areas → Planting Areas |
| 5 | Generate the area's beds | Yes | Areas → Planting Areas (grid icon) |
| 6 | Build the production plan | Yes | Planning → Plans |
| 7 | Follow the execution | — | Planning, Home, Reports |
Screen names below follow the app's English labels; the screenshots show the Portuguese interface, which is the default language. Change the language in the sidebar footer if you prefer.
Step 0 — Sign in and pick a plan
- Open Plantaro and sign in with your e-mail and password (see Access and account if you do not have an account yet).
- If your property has no subscription yet, the system opens the Subscriptions screen with the message "No active subscription". Pick a plan and follow the checkout.
- Free plans are enough for this tutorial, but they have limits (for example, the Basic plan includes 1 planting area and 2 crops). When you reach a limit, the system shows a window explaining which resource ran out; just upgrade in Subscriptions.
Expected result: you land on Home (dashboard), still empty.
Details about plans, users and invoices: Users, organization and subscription.
Step 1 — Learn the navigation
On first access, the interactive tutorial shows a welcome card. You can start it, dismiss it ("Not now") or turn it off ("Don't show again"). None of this prevents you from using the system.
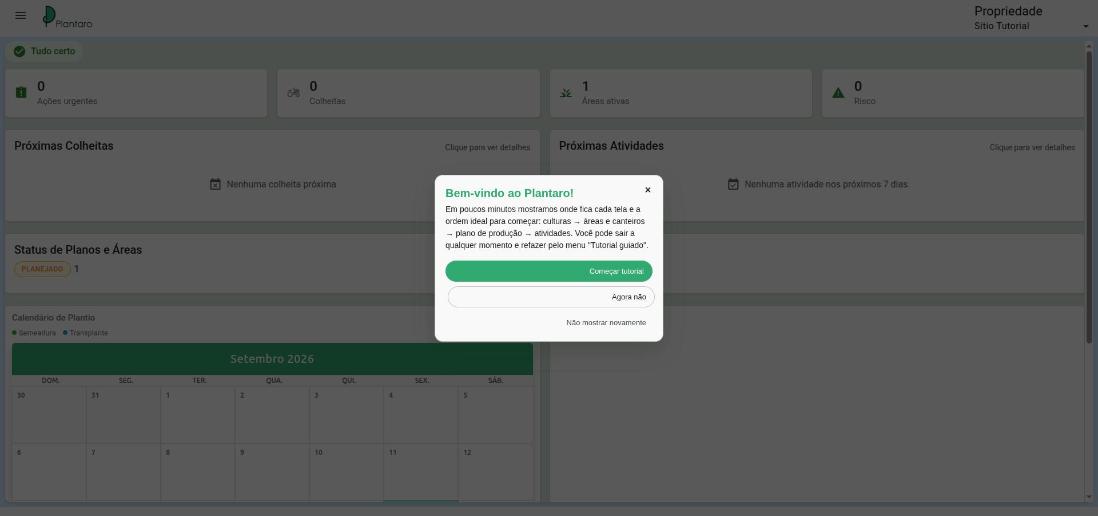
What to know about the screen:
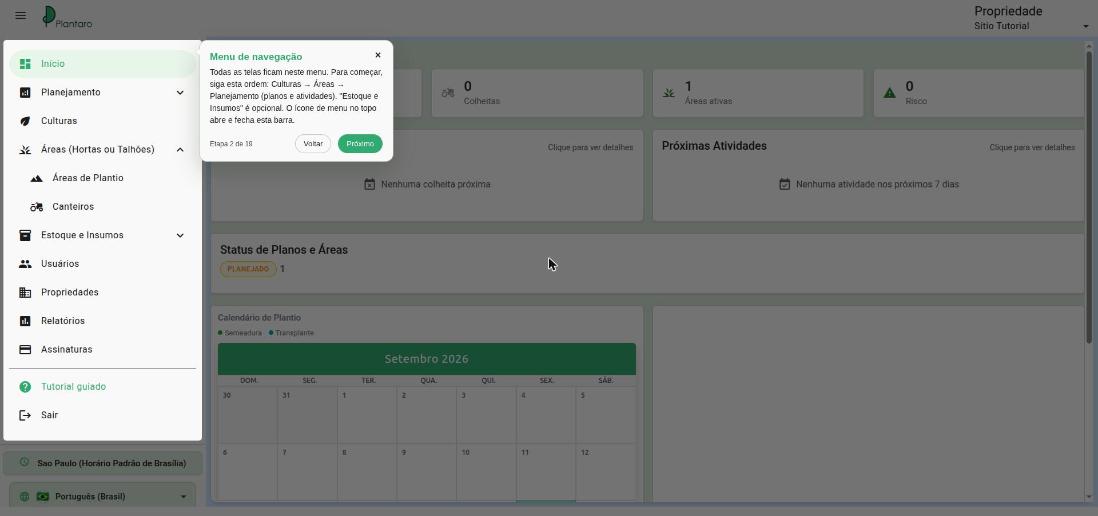
- Side menu: it is closed by default. Open and close it with the three-line icon (☰) at the top left. All screens live there.
- Current property: at the top right. If you manage more than one property, switch there. Everything you see and create belongs to the selected property.
- Menu order: to get started, use Crops → Areas → Planning. Inventory & Supplies is optional.
Step 2 (optional) — Supplies and stock
Only do this step if you want stock control and shortage forecasts. You can come back later without losing anything.
- Open Inventory & Supplies → Supply Categories and create categories such as "Seeds" and "Fertilizers".
- In Suppliers, register who you buy from.
- In Supplies, register items with unit and stock quantity.
- In Supply Shortage Forecast, follow when a supply will run out against what the plans will consume.
Full walkthrough: Resources and stock.
Step 3 — Register the crop
The crop is the agronomic "template": what you plant, spacing, expected yield and the cycle stages. The plan uses this data to calculate dates and quantities.
-
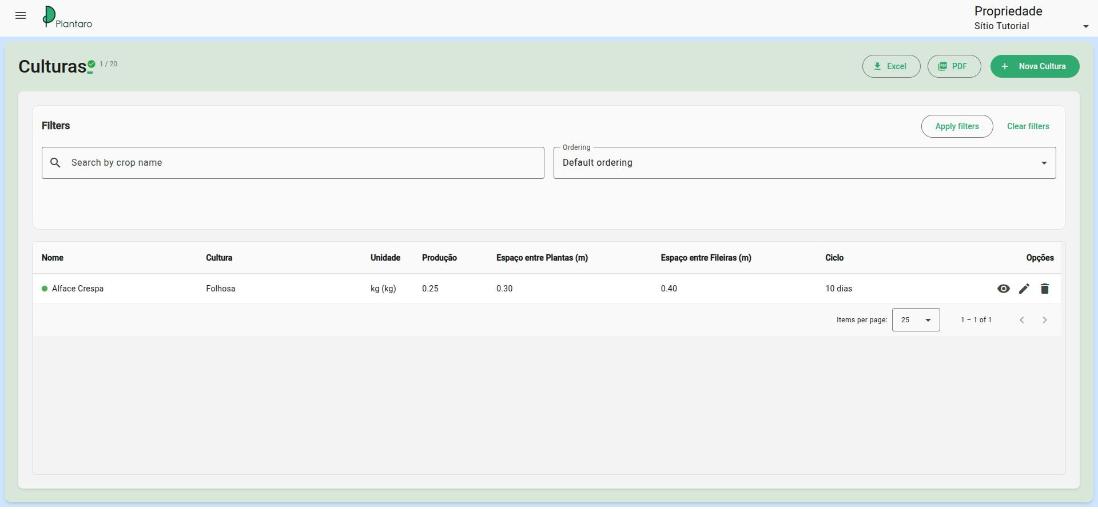
Open Crops and click New Crop.
-
Fill in the form. Fields marked with
*are required:Field What to enter Example Crop name Name shown in plans Alface Crespa Crop group Group or category Leafy Color Color used in charts and canvas (default) Plant spacing (m) Distance between plants in the row 0.30 Row spacing (m) Distance between rows 0.40 Unit of measure Yield unit (kg, g, t…) kg Yield per plant How much each plant produces 0.25 Utilization (%) Usable share of the yield 85 TSW (kg) Thousand-seed weight 0.003 Seeds per plant Seeds used per plant 2 Water per day Water consumption per plant per day 0.2 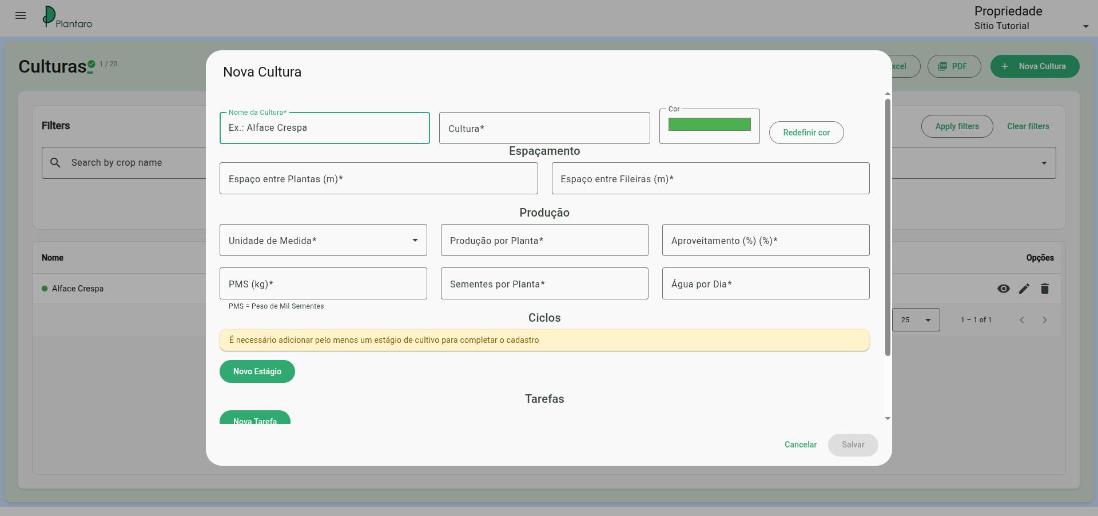
-
Under Cycles, click New Stage. At least one stage is required to save. Each stage has:
- Stage type: Sowing, Transplant, Growth, Harvest, Maintenance or Other.
- Stage name and How many days it lasts. The header shows the cycle total summing the stages.
- Generate task: when checked, the stage generates a task (with start and end time) in plans that use the crop.
- Stage resources: supplies consumed in that stage (optional).
Tip: the stage name is pre-filled with the chosen type. Clear it before typing yours, or the name will be duplicated.
-
(Optional) Under Tasks, add recurring tasks such as irrigation.
-
Click Save.
Expected result: the crop appears in the list with the total cycle (for example, "10 days").
More details and validations: Crops.
Step 4 — Create the area
The area is the physical space where you will plant (garden, greenhouse, field).
- Open Areas → Planting Areas and click New Area.
- Fill in Area name, Width (m) and Length (m). The right panel shows a proportional preview of the terrain with the computed area (200 m² in the example).
- If you prefer, use Draw on the map (Map and coordinates tab) to mark the terrain by coordinates.
- Click Save.
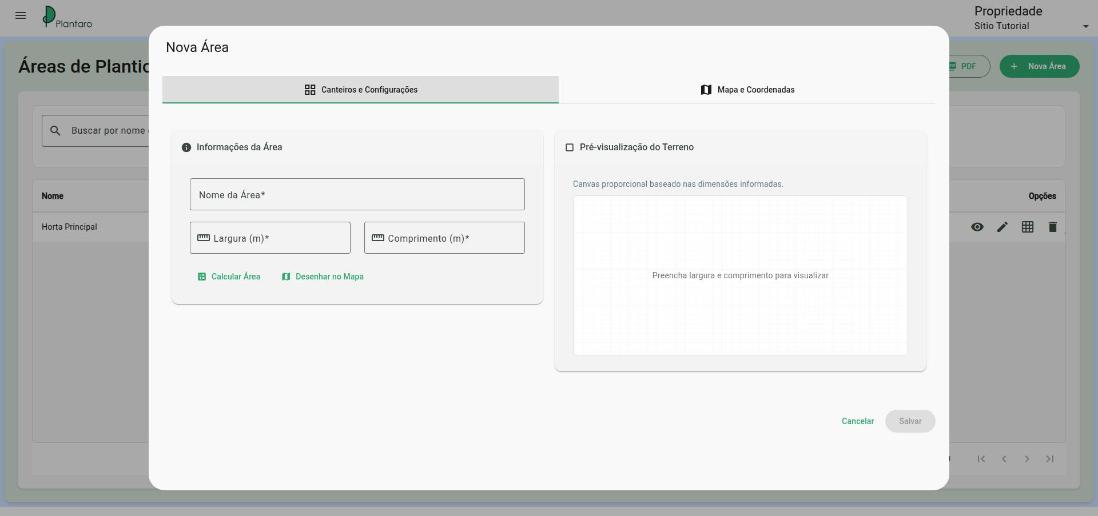
Expected result: the area appears in the list, but with 0 beds and a warning icon in the Beds column. This is normal: the next step creates the beds.
More details: Areas and beds.
Step 5 — Generate the beds
Without beds there is nowhere to allocate planting. They split the area into individual strips.
- On the area row, click the grid icon (Manage beds).
- Click Generate New Beds.
- Adjust the Generation parameters:
- Quantity: how many beds to create (6 in the example).
- Width and Length of each bed (1 m × 10 m in the example).
- To let the system distribute spacing and margins automatically, turn on Automatic distribution. In manual mode you control the spacing.
- Check the Preview on the right: the beds appear inside the area, numbered.
- Click Save Changes. To give up, use Discard Changes.
Expected result: the Manage Beds screen shows beds 01 to 06 inside the Beds area.
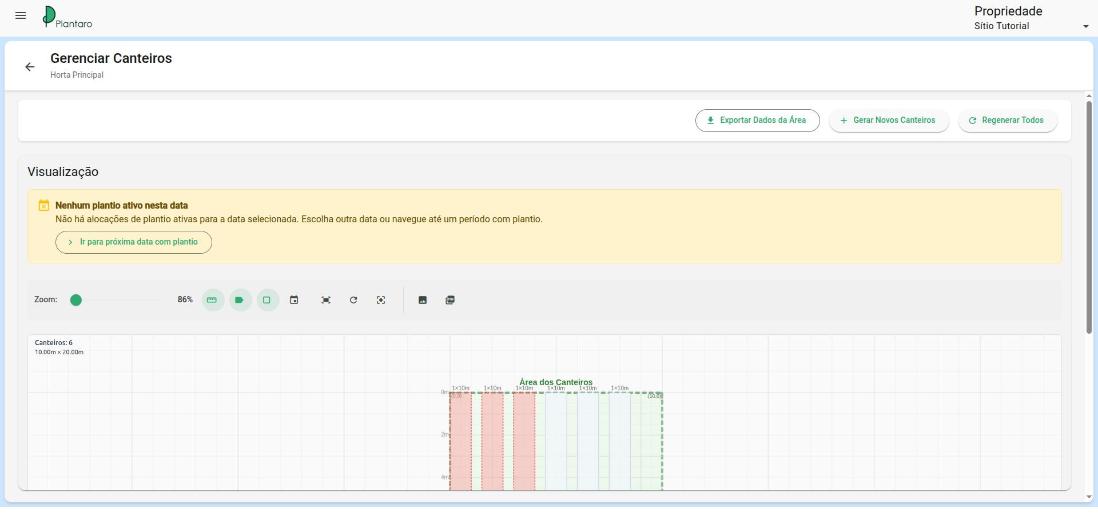
Note: Regenerate All replaces the layout and is restricted when plantings are already allocated. Plan the layout before creating plans.
Step 6 — Build the production plan
The plan crosses crop + area + dates and calculates plantings, harvests and quantities.
-
Open Planning → Plans and click New Plan.
-
Fill in Name (Alface Primavera) and Area (Horta Principal). The Bed status indicator shows how many beds are free.
-
Click Add Crop and fill in:
Field What it means Example Crop model The crop registered in step 3 Alface Crespa Quantity per interval Desired output at each harvest interval (the ✨ button suggests a value) 50 kg Harvest interval Every how many days to harvest 7 Cycles How many cycles in sequence 1 Starts on Planting start date 01/10/2026 Ends on Automatically calculated 11/10/2026 Keep staggered production Turns on staggered mode (see below) On -
Check the Harvest per interval summary and the calculation line, for example
50 kg / 0.25 kg/plant = 200 plants. -
Under Crop distribution, choose where to plant when there are free beds: after the last bed in use or using gaps in the middle.
-
Click Create as draft (to review later) or Create and activate. If something is missing, the yellow box "The plan cannot be saved" lists exactly what to fill in.
Dates: prefer picking the date in the calendar (icon at the right of the field). If you type it, always check the Ends on date and the harvest summary: a date typed with day and month swapped produces a wrong period.
Staggered or not? They are different modes:
- Non-staggered: plants all beds at once and harvests everything at once.
- Staggered: beds enter in rotation at each interval, so you harvest continuously (for example, every week).
Expected result: the plan appears in the list with status Planned, the area, the crop, the dates and the total yield.
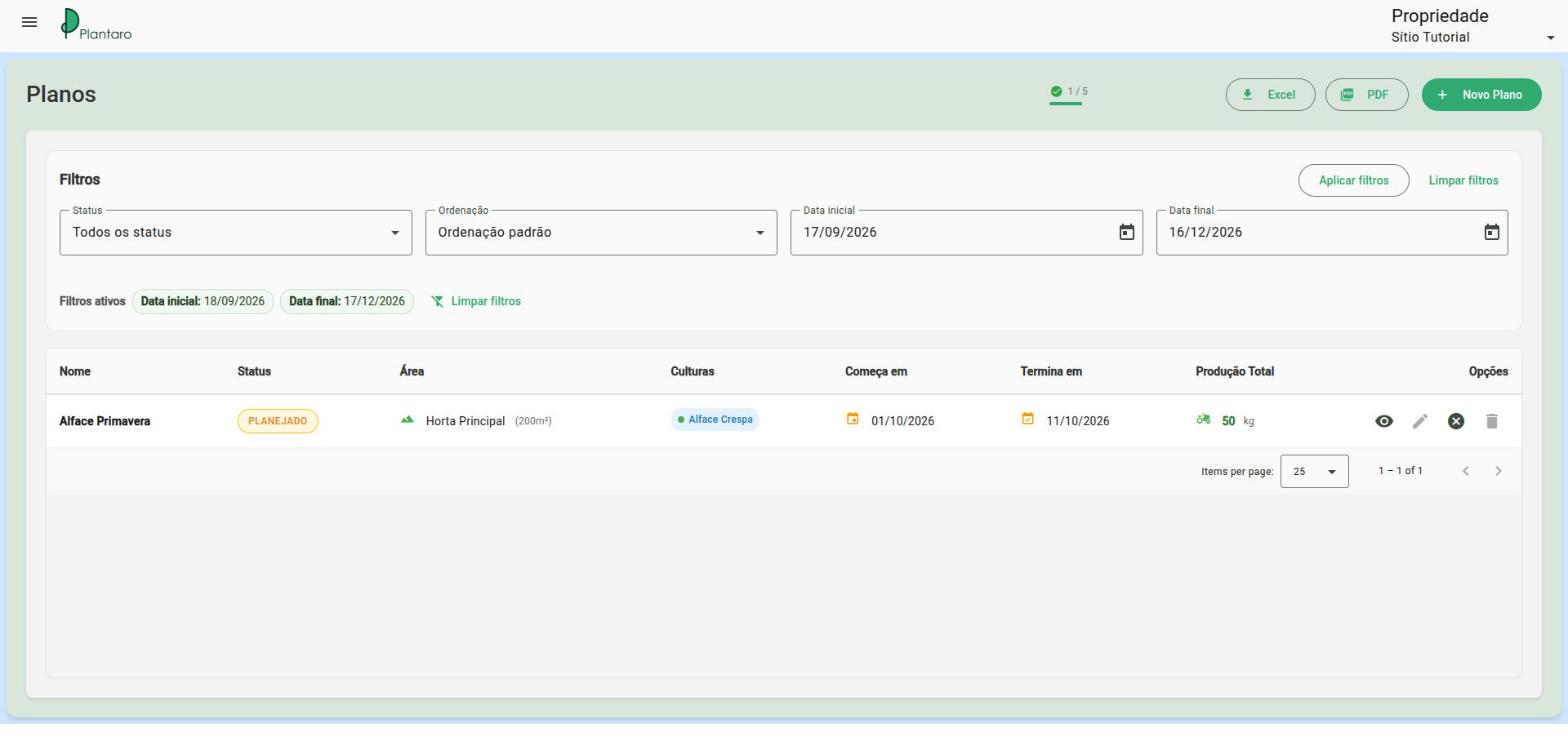
Can't see the plan? The plans list has Start date and End date filters (from today on). Plans outside that period are hidden: adjust the dates or use Clear filters.
More details, statuses and canvas colors: Production plans.
Step 7 — Follow the execution
With the plan created, Plantaro starts building the work schedule.
-
Planning → Upcoming Plantings/Harvests: lists the next plantings and harvests with date, crop, stage, plan, area, quantity and water consumption. Filter by period, area, plan and crop.
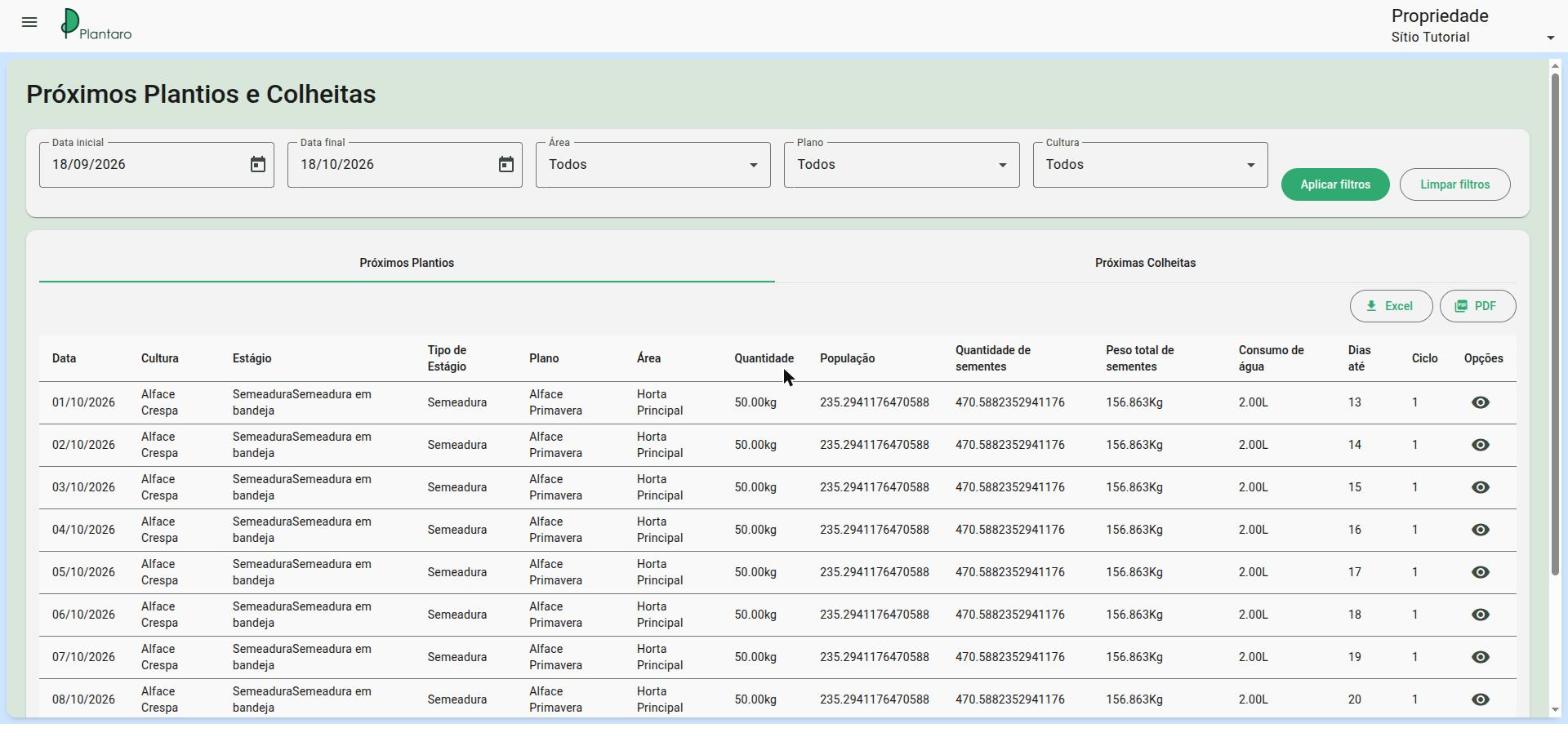
-
Planning → Activities: day-to-day tasks. Filter by period and status and mark them done when finished. Tasks come from stages with Generate task checked and from the crop's tasks.
-
Areas → Beds: list of all beds with dimensions, status and whether they are free or occupied (and by which plan).
-
Planning → Schedule: calendar with plantings, care and harvests over time.
-
Home (dashboard): summary with urgent actions, harvests, active areas and risks, plus plan status and the planting calendar.
-
Reports: generate and schedule production, task and consumption reports.
Details: Tasks, timeline, plantings and harvests, Dashboard and Reports.
Next steps
- Invite your team in Users: Users, organization and subscription.
- Control stock and follow the shortage forecast: Resources and stock.
- Replay the interactive tutorial any time from Guided tutorial in the side menu.
Completion checklist
- I have an active subscription.
- I registered at least one crop with at least one stage.
- I created an area and generated its beds.
- I created a production plan and it shows in the list.
- I see plantings and harvests in Upcoming Plantings/Harvests.